You will also find a map of Puerto Armuelles with photos on it too.
If you are looking at property, it is worth your time to check out these hand-picked properties.
If any of them spark your interest, feel free to call or email us with your questions or to schedule a tour.
Jan 1, 2017
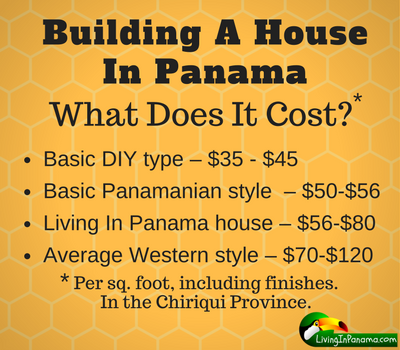
“How much does it cost/square foot to build a house in Puerto Armuelles?”
The answer depends upon what kind, size, and quality of house you are building.
If you build a fancy house, with lots of expensive materials (expensive windows, doors, custom fixtures, etc.) it will cost a lot more than a very basic house. It won’t cost just 10%, or 20% more. Building a fancy house can cost 2 to 10 times more than a very basic house.
In Seattle, circa 2016, building a basic house costs about $200 per square foot. A house with expensive finishes can cost $250 to $500 per square foot (I am not kidding). And it goes up from there. An architect-designed, custom timber-framed, Japanese tea house or fancy outdoor sauna building on the lake could cost over $1000 per square foot
In Puerto Armuelles the answer is the same: it depends upon what kind of house you are building.
Fancy Houses
On the high end, there are wealthy expats who have had homes built on the beach by local contractors. They can easily spend $100/sq ft and more. This does not include the cost of the land.
More Basic Houses
On the other hand, in Puerto Armuelles we have several expats who have been their own contractor and have also done a lot of the work themselves. These folks have completed their projects for under $35/sq ft. Granted some of these homes lack much of a design concept since the owner-builders had not built before. However, the owner/builders appear quite pleased with the results.
I have done a brief survey of costs recently. I took into account my conversations with builders and owners. (As I drive around the Chiriquí province, I often stop by construction sites to chat.) I have also done the usual online research that is available to all of us. Based on these sources, I have concluded the cost figures below.
Cost per Sq. Ft Range
As I read the descriptions of the different grades or qualities of construction available at the various price points, one thing is quite familiar. Just as in the US, the big difference in the cost of construction is in the finishes.
Finishes include:
The finishes vary greatly in price. The cost per square foot for the structure of the house does not vary nearly as much as it does for the finishes.
People understandably want to know how much it will cost to build a house in Panama.
The Living In Panama House has the advantage of being designed by an architect specifically for Panama's tropical climate.
The Living in Panama house is an entire “rethink” of the concept of “home” in the tropics. The Living In Panama house is mostly an open-air living concept. This open-air structure, with just a portion totally enclosed, means that only a small section of the house requires the full complement of finishes. With this type of design, you eliminate the need to pay for extra windows, doors, air conditioners, insulation, or cabinetry. Not that you don’t have those finishes, but fewer of them are needed.
Because of this savings, the Living in Panama House, can be built, including finishes, for between $56 and $80 per square foot. This is a huge saving.
The structure of the house, without finishes, costs an estimate of $30 per square foot for the 2 bedroom model and an estimate of $38 per square foot for the 3 bedroom model.
The cost of building anywhere in Panama varies. The biggest variable is your choice of finishes.
Summary of cost/square foot (including finishes)
I hope this helps to answer this popular question.
We have written about remodeling, various construction materials, and alternative housing types. Click on any of the links below to read an article.
Please share your experiences with the cost of building a house in Panama. Use the comment section below. Thank you.
1) There is a lot of it. So there are many opportunities of buying the location you want at a price you can afford.
2) Vacant lots cost less. Somewhat surprisingly, even a lot with a structure that looks like it should be torn down, is priced higher than a similar lot with no structure. Check it out for yourself. There must be some psychological reason for this.
3) Investing in a vacant lot carries very low overhead costs---and there is usually very little maintenance required.
4) You get complete freedom to build & landscape the way you want. You decide where on the lot the house will be built, and what it will look like. You decide the look and feel of your property. If you have never gardened before, this is the place to get started. To cultivate many species, you simply get a cutting, stick it in the ground, and water. If you plant in the rainy season, you can skip the watering part. The term tropical paradise fits gardening perfectly here.
In Panama, you can buy a lot in the jungle with no infrastructure around --- not even a road --- or you might choose a lot in a sub-division, a place that has everything you need in place, ready and waiting for you to build your home.
More Remote = More Hidden Costs
Obviously, a lot that has everything ready to build your house will have no additional development costs. While a remote jungle lot could have very high development costs. Development costs are all the expenses necessary to get a site ready to start construction of a home.
Before you jump to the conclusion that an undeveloped lot is a screaming deal, you must factor in all the hidden costs. That is, how much will it really cost to get the property into “ready to build” condition.
The True Cost = Sales Price + 4 Hidden Cost Factors (described below)
You should calculate the true cost of a lot before you decide to buy. This is true even if you only plan to hold the property and sell it when it goes up in value. Most likely the person you eventually sell the property to will want to build on it. You need to make sure you are buying a lot that will be attractive and affordable to your future buyer.
Cost of the road or driveway will depend upon the lot’s
If you fall in love with a lot that is far from an access road, it will obviously cost a lot more to develop than if your lot is near, or on, an already established access road.
If the property is on a steep slope, that will open up whole new realm of hidden costs. Not only will the road cost a lot more and take more time, but you will have to deal with erosion and drainage issues. In a hilly area, you must take care to consider what to do with the water runoff so your new road won't be come a mud disaster. One key to a successful road is to put it in the dry season, not the wet season. After all the work of creating the road, you want it to stay usable for years to come not be washed out in the next big rain.
If you want to keep your road development costs down, or at zero, you should pick a lot that is
Google Earth - A Real Estate Tool
With Google Earth you can discover topographically challenging lots from the comfort of your computer. And you can use it to get a feel for the property before you visit it. Google Earth is free and can be used with both Apple and PC computers. To use it, you need to download the software and then search for your property by using its address or coordinates.
Now comes the fun part. You can zoom in using your mouse/curser and the command (control for PCs) and shift keys on your keyboard. Using the same controls, you can tilt the earth so you can see precisely where all the hills and valleys are on the lot and in the surrounding area. If you don’t know the lot's coordinates or address, you can usually find them using Google Maps (if you can locate the lot by sight), or by asking the seller for them.
Now that you can access the lot, you need to get it ready for constructing a house.
Ideally, your site is already level. Or it could simply mean removing some trees (just make sure to get a permit to do that) or adding a moderate amount of fill to level out the site.
If you are building on a slope, it will be more complicated. You may need a major earth building project including retaining walls and or drainage system.
Make sure you get a good ideas of the cost of these steps or it may come as an unwelcome surprise.
If you want to keep your site development costs down, or at zero, you should pick a lot that is
We have many affordable and beautiful lots. Almost all of our lots are ready to be built upon. No site or road development is needed. Many already have full utilities, or we offer to do that work at no extra charge. All are in the Puerto Armuelles area.
You can explore our properties by clicking here or using the property search tool at the top of the page.
Now on to getting utilities to your building site.
Generally, there is electricity available along all of the main roadways and neighborhood streets in Panama.
In Remote Areas
If you are buying a farm, or other remote property, you will be responsible for bringing in electrical power from the nearest road, where you will access it via overhead power lines. You will need to install your own power poles, or underground conduit, to access this power. And of course, you will need a licensed electrician to obtain an electrical permit, even if you are going to do your own electrical installation.
Alternatively, you can always decide to be completely off-grid. Just be sure to factor in the full cost of setting up and maintaining your own electrical system. Of course, if your lot is extremely remote you will have to go off-grid.
In Developed Areas (e.g., Puerto Armuelles)
In Puerto Armuelles, we generally have good access to power lines by our electrical utility provider (Union Fenosa). This makes electrical installation simple.
Once you start to build your house, you can connect the meter to the house in 2 ways. You can either hang an overhead line, which enters through the roof of your home, or you can install underground conduit, with the supply wires running inside. These wires connect the breaker panel to the electrical meter at the property line. From the breaker panel, you can do your own rough in wiring, or hire an electrician.
You can live without electricity, but not water. How will you get water to your lot and future house.
In Remote Areas
Before you buy a property in a remote area, make sure you know how you will get water to the site. It is likely that you are going to have to dig a well. If it is a well, check with an engineer to verify that you can actually build a well. Find out how deep a well you will need to dig. Then calculate the cost. If you are told there is a well there already, I suggest you check this out and test the water.
About Digging Wells
The good news about well digging in the rural areas around and as well as in Puerto Armuelles, is that it is very cheap. In most cases, wells are dug by hand, using a shovel. Our soil is silty/sandy, and it has no aggregates. (This is why it is not the most stable building substrate, and building footings should be deep and use plenty of steel reinforcement).
In short, a laborer digs your well, and then you line it with concrete pipe sections which are available in 4 foot lengths, and in many diameters from 10" to 2 or 3 meters.
Please be aware, hand digging is dangerous for the laborer. You should check with the municipal engineer to find out the details for doing this safely and if the person doing the work is covered by insurance. You can make it safer by having the hole supported, or "cribbed" during the excavation.
The pipe sections used to line the well are very heavy. You will need to schedule a back hoe to have them installed. You might just opt to use a back hoe for the entire well digging process, however the result will be quite sloppy. Back hoes cut a very wide hole. All that dirt will need to be stored on site until it is back filled. The dirt excavated for the actual well hole will need to be stored or used permanently either on site, or off site.
And, of course, you can also employ a well drilling company. There are some located in David. Just look them up on the Internet. I have not used a well drilling company yet. Obviously, this is the most expensive well digging option.
In Developed Areas (e.g., Puerto Armuelles)
In Puerto Armuelles (and other developed areas), most locations have access to the municipal water supply.
Hooking Up Water
To gain access to the municipal water supply, you simply cut in a connecting hub, or collar, into the ABS water line that runs alongside the street nearest your lot. In Puerto Armuelles, this ABS pipe is likely to be 3" in diameter.
You can buy a connection collar at most of the local building supply stores in Puerto Armuelles. You will need a permit both for the water supply line hook up and for any necessary street cut for the new pipe. You will only need a street cut permit if the city water line happens to be located on the opposite side of the street from your property. This street cut is performed by MOP (Ministry of Public Works).
I am fairly certain that you can apply for your own permit. However, for the $20 that my plumber charges to do all the legwork of obtaining permits, I never get my own permits. At all costs, I try to avoid waiting in lines at all of the various municipal offices. I don't have the patience.
Service & Expense
Generally our water service is good. The water is abundant and cheap. Our bill is under $5.00/month for unlimited use.
Interruptions in Supply
Many locations in Panama, including Puerto Armuelles, still experience occasional water shortages. In our area, these are not actual shortages, but rather interruptions to service. Water service is temporally shutoff due to a highway building project, or occasionally, storm related damage to a water supply pipe during heavy rains. Such interruptions are becoming less and less frequent. This is certainly not a chronic problem anymore, not the way it was 10 years ago. In addition, the water to our neighborhood is shut off in the afternoon everyday. I have never been clear about exactly why this is done. But it is the reason almost every house in our neighborhood has its own water tank.
Install A Water Tank
It is never convenient to be without fresh water, even for a few hours. The easiest way to overcome this is to have your own water storage tank located on your property. That way, you won't even notice when the municipal water supply is shut down for an hour, or even an entire day. You will have your own backup supply on your property.
At our house in the Las Palmas neighborhood we have a 140 gallon emergency tank. It is raised up on a platform about 12 feet above ground. It fills whenever there is city water pressure. When the municipal water fails due to road work, which has been pretty common with the new highway construction, or due to the new water and sewer system being installed in Puerto, we are covered. We also use it everyday as the source of our water after the city water is mysteriously turned off for the day. We have a gravity feed from this elevated tank directly to the house---we don’t use a pump. It has been years, since we were absolutely “out of water”.
Water Drinkability
Generally, water is drinkable in Panama. Bocas del Toro is the only blanket exception to this rule. In addition, at times, Panama City has issues with its water quality.
But again, overall, Panama's water is perfectly drinkable. Much more so than some areas of the US (not even including Flint, Michigan). My daughter still reminds me of how truly horrible the water is in the elegant neighborhood of Washington D.C. where her grandparents live. My parents happily drink that water. They are used to it. My children considered it to be unfit for human consumption.
Although the water in our town is drinkable, most expats and many Panamanians filter or buy bottled water. Many people (like us) get bottled water delivered to their home. Some people are concerned about water quality, but many people do it for aesthetic reasons. In the rainiest times of the rainy season, the water from the tap can look cloudy. That is what prompted us to start drinking bottled water. We always use tap water for cooking, but for drinking we use bottled water. At least we do at home, when we go out we happily drink the tap water.
You must include the cost of taking care of all the outflow from your home as well. How you take care of this depends upon where your lot is located.
Out of Town & Remote Areas
Sewer service is only available right in town, or along the main roads. If you are not in town, or on a main road, you will need to invest in a septic tank.
You are supposed to get a permit for most plumbing projects, including a septic tank. This application must be submitted by a licensed plumber, even if this plumber is not going to do the work. Talk to your neighbors to learn more about how this septic tank permit & installation process is usually done in your area.
Installation of Septic Tanks
There are a variety of methods for installing a septic system. The very poorest people in Puerto Armuelles simply dig a deep well, line it with old car tires, and run their pvc waste line into it (or put an outhouse on top).
Most locals who can afford it, build 2 separate septic tanks out of concrete block.
The 1st one, in line from the house, captures the solids and lets the liquid flow off the top toward a secondary tank. This 2nd tank is filled with large round drainage rock. (This rock is available from local rivers. It can be delivered to your building site by local truck operators.)
This 2nd tank provides a drainage “field” which leaches out into the surrounding soil, and hopefully, filters out all dangerous bacteria, before flowing to a nearby stream, or the ocean.
You can also purchase black plastic (ABS) molded tanks from local building materials suppliers, or from suppliers in David. Most suppliers in David offer delivery services to Puerto.
In Town - Sewer Connection
If your lot is in town, or off a major road, you can hook up to the municipal sewer system. To connect to the municipal sewer pipe on your street, again, you must apply for a permit. Again, this application must be filed for by a licensed plumber, even if this plumber is not going to do the work.
The connection is a simple matter of cutting in a connecting hub to the municipal sewer line, usually 6” pvc pipe. Generally, homeowners connect their own 4” pvc pipe to this 6” pvc pipe. It is a simple procedure. Pipes are not buried very deeply. Generally not over 3 or 4 feet. Given that our soil is silty/sandy, this kind of work can usually done with a couple of laborers with hand shovels in half a day.
The entire connection process, including plumbing and backfill, shouldn’t take more than a day. That is, after you have the permit in hand.
Before you buy a lot, you should estimate the cost of permits, materials, and labor to get utilities to your building site.
Obviously, if all your utilities are already delivered to your lot, you will be saving both money and headaches. If your lot is in a remote area, your "get your site ready" development costs will be a significant part of the true cost of your lot. Also, don't forget to factor in the amount of time it will take to get all that infrastructure into place.
The bottom line: Is the lot worth the price?
To know that, you first need to know the true cost of the lot. True price = Sales Price + 4 Hidden Cost Factors
Which Is The Better Buy?
Calculating the true price eliminates many unexpected expenses. It also allows you to knowledgeably compare seemingly diverse properties. For example, knowing the true cost of properties allows you to know which of these similarly sized and located lots is a better buy:
Hopefully, you now have a better understanding of what it means to buy an empty lot. As we explained, depending upon the lots location, getting an empty lot ready to build upon can be very easy or very challenging process.
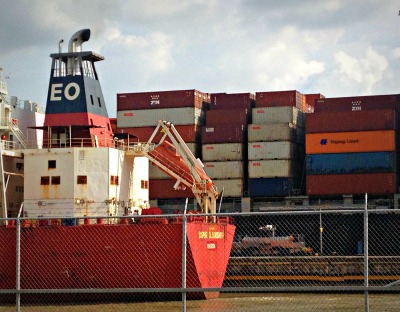
I am particularly interested in ways to keep a shipping container's living space cool, comfortable, and affordable in the tropics.
I recently heard that you can buy a used shipping container in Panama, delivered to your site in Puerto Armuelles, for under $3000.
This price appears to fluctuate widely based on the global economy.
When business is booming, containers are scarce, and thus expensive. When markets are down, there are more abandoned containers since there are fewer goods to be shipped.
As far as shipping containers are concerned, I do have a bit of experience. I have both fixed up a container as a basic living space and visited some high end container living spaces.
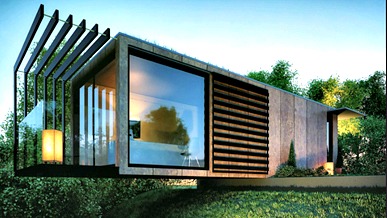
A couple of my Seattle designer/builder friends have created “gourmet” shipping container buildings. I have visited those units. So I have experienced how a shipping container can be transformed into an artistic home.
One of my friends, Hartman Kable, created a modernistic take on the surfer “shack” using a shipping container. It has been featured in various magazines, including Make Magazine's video below. The publicity earned Hartman a trip to the east coast to do another similar project for a high end client.
I like that Hartman kept the look of the container. He didn't radically transform the container so that it was hard to see that the base building material was one or more shipping containers.
Hartman gives a tour of his cool container surf shack in Make Magazine's video below. I'd recommend skipping their very long intro and going directly to Hartman's tour at minute 1:25.
[leadplayer_vid id="579B56D30E20D"]
(Note, Hartman built this on the Olympic Peninsula in Washington State, which has a very different climate than Panama does. You would need to add air conditioning to use something like this in Panama.)
When I was commercial fishing in Alaska, I spent 2 summers living in a shipping container. The container was delivered and leveled right next to the cabin of my employer. This was on the bluff above the mouth of the Egegik River on Bristol Bay in SW Alaska.
One of my pre-season projects was to outfit this 40’ container as a combination net shed, work shop, and crew quarters. The remodel had to be simple because of our very limited supply of building materials. We had to use what we had since we were out on the tundra above Bristol Bay, about 200 miles away from Anchorage, .
The container was an insulated refrigerated model with teak paneling and floor. (Note: most containers are not insulated). It cost $1000 at the time, delivered to our site. So it was affordable. Certainly cheaper than building a similar structure out of more typical materials.
In our wide open, cool, windy tundra base camp, the container was perfect. I put a heater in it. I easily stayed warm. I slept very well since I was always exhausted after the days work. (A long day being 20 or 30 hours of fishing without sleep.)
The container was a secure cocoon in an environment where the wind often blew 50 miles an hour. Our summertime high air temperature was usually around 50 degrees Farenheiht, and the water temperature was in the mid to high 40’s. In a word, my container building was “snug”.
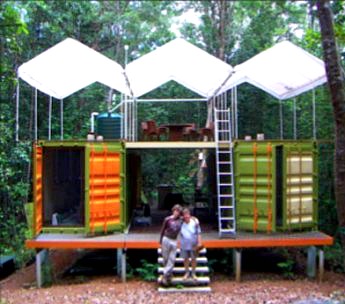
Conversely, in our tropical environment here in Puerto Armuelles, “snug” is not a good thing.
If you look at an indigenous tropical hut, what you will observe is a roof and support for that roof. Not much more. There might be some lightly woven mat walls or bamboo to provide some privacy from neighbors, and a little extra shade.
Generally a good building type for the tropics is a lot like an umbrella. Shade, Shade, Shade, plus, protection from the rain.
In a perfect tropical world, walls are not necessary at all. They are a hinderance to air flow and evaporation. We northerners mostly like them, because they afford privacy, and security.
In fact, while Panamanians are often cold at night and in the early morning, most northern immigrants, except in the highlands, do not require walls for warmth. Our need for walls is generally for privacy, security, and in large part, because we grew up in houses with walls. We just think that houses “should” have walls.
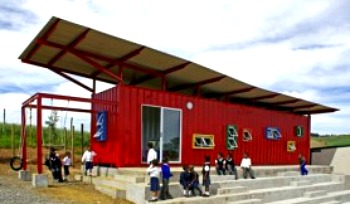
The challenge is how to make a cool and comfortable container house in Panama.
The easiest way to do this is to keep the sun off your container. Solar gain is the biggest factor in hitting up your container home.
A site called containerhomeplans.org specifically discusses what to do to keep your container cool in Panama and elsewhere.
Read more details at containerhomeplans.org here and on this page.
As I have mentioned, ventilation and air flow is a huge factor in keeping living spaces cool. Tropical houses are typically designed to maximize air flow for this reason.
To achieve adequate cooling air flow in a shipping container, requires that you modify the container. One example of what that could look like is seen in the South African classroom photo.
However, if you like the idea of closing up the container as a secure pod, you cannot do that. (Watch the video above to see how Hartman is still able to secure his container using the original container doors.) You will need to use air conditioning. You may even want to use a portable air conditioner so you can safely store the A/C unit inside the container.
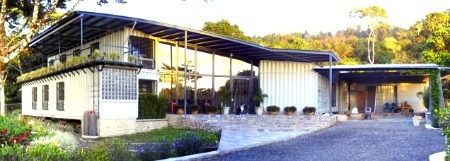
Successful Container Housing In Panama
People have been successful in creating container housing in Panama. A couple who created a home using multiple shipping containers near El Valle, Panama. They detailed how they built it in their blog.
It took them 5 years to create their container home (see photo). In the end, the amount of work they did to create their container house means that it is not the cheap and easy option that attracts so many people. They are currently selling their home for more than half a million dollars.
My Opinion
In short, my opinion of shipping container construction in low-land tropics is low. I don't enjoy living in air conditioned spaces with low ceilings. It seems clear that without a tremendous amount of work, that is the type of container house you must live in here.
I don't think using a shipping container is a good option for a pleasant home here in Panama. You can build a much more pleasant Panama house using cement - and it is affordable. You can either use formed and poured, or concrete block (the most common method) for your new home.
Containers do make great tool or other storage, if you can find one at a good price. Keep in mind that, if left in the sun, the interior temperature of a shipping container is likely to reach 160 degrees Fahrenheit. Of course, you can build a roof over your shipping container to provide some protection from the sun.
If anyone has more information, contacts, or websites to share, I am certainly eager to learn more about shipping container construction. I think our readers would also be interested.
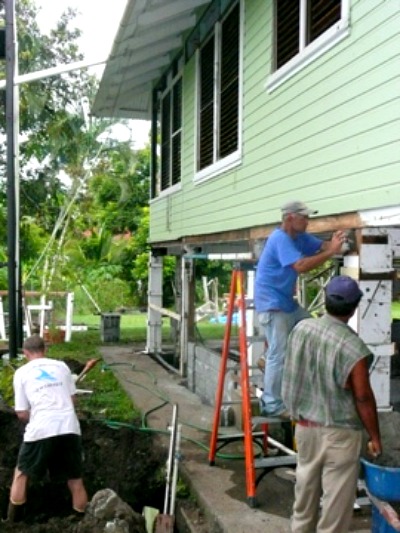
Wood is a great way to build in the highlands of Panama, such as in Boquete and Volcan. Or a place where there is a desire for an insulated wall cavity to contain fiberglass insulation. In the highlands, builders are pretty familiar with wood construction methods, so finding good carpenters is possible.
On the warmer coast of Panama, unless you are air conditioning the whole house, the insulative quality of a 2x4 cavity is not of much benefit.
Having adequate ventilation is far more critical in the warmer lowlands of Panama.
Moisture can collect in unventilated wall insulation. This leads to wood rot and provides a breeding ground for unhealthy mold spores.
As I mentioned, a key reason not to build with wood is termites. Termites are more pervasive in Panama's warmer coastal regions than in the highlands. To be fully protected from termites, any wood used in construction needs to be pressure treated with arsenic, or some equivalent insect repellant. This means that the entire wood structure of your homes would be built of a highly toxic, non-environmental safe material.
If this is not an issue for you, chemically-treated wood is available in nearby David. It is usually imported from Canada. Keep in mind, that it is expensive.
You can use locally available hard woods that are naturally more resistant to pests, but they are just resistant, not impervious. You will have to tend to your wood on regular basis by injecting poison where you see evidence of termite infestations. If you don't do that, your house will slowly be eaten from the inside out.
Wood is definitely not a low-maintenance or low-cost building material choice in Panama. For all these reasons above, we are not using wood as our primary construction material in our Living In Panama House.
Keep in mind, whether you build with wood or not, roof insulation as protection against thermal gain from the sun is needed in both the highland and lowlands of Panama. Solar gain is the main source of the excessive heat in the tropics.
Having said all this, if I were to build a two story structure, I would use both concrete and wood. Concrete for the 1st floor and pressure treated 2x’s for the 2nd floor. The upper floor would be mostly open air with very little wall.
Costs More to Build & Maintain
A house built with both materials is more costly.
Also, finding skilled carpenters in Panama is more of a challenge than finding skilled masons.
Our family likes the ideas of a multiple story house made of wood and concrete. We are toying with building ourselves a 3 story “tree house” on one of our lots by the beach. Of course, we have to assess how much effort we are willing to put into the endeavor.
We are not the only expats who have chosen to remodel a wood house in Panama. There are a few other expats in Puerto Armuelles who have remodeled one of the 2x4 framed Chiquita Banana houses. I believe each of these owners had a lot of construction experience in the US, prior to moving to Panama. So the wooden houses appeared to be familiar terrain to them.
In each case, the owner-builder ended up either doing much of the carpentry himself or had to train his crew from scratch. This is because the labor pool knew nothing about high quality wood construction. Alternatively, they had to accept a grossly inferior product from an incompetent local carpenter. Most of these projects resulted in a combination of the 3 methods above.
One fellow, who is doing a beautiful job remodeling a house in our neighborhood, has been working on his house for over 3 years, and it is still not finished. This fellow is a superb craftsman and the house project is beautiful. However, from my point of view, it is too much money and too much effort. I have spoken with this guy many times over the course of the project. He has said that he would not attempt the project, if he had it to do over.
Our own situation is not dissimilar, although we did not forge ahead quite so doggedly. Our own wooden Chiquita house remodel is only half finished. After six months or so, I finally just fired the crew.
Today, I don’t think too much about my half finished Chiquita Banana House. If I do think about it, I see 2 possibilities for our home. 1) I will complete the project myself, over time, rather than employ locals to do the finicky carpentry. 2), more likely, we will continue to live in the half-remodeled structure.
Our house works fine as it is. In fact, we love to live in it. It feels sort of like living in a huge, well-ventilated artists loft apartment. We have loads of space (about 3500 square feet on two floors).
Not finishing my wood house remodel allows me the time to focus our construction efforts on our beach properties. As a rough comparison, I estimate that I can build 5 or 6 open air, concrete beach houses in the time that it would take to complete the remodel of our wooden Chiquita Banana House. Plus, I think concrete construction is a lot more fun and a more productive use of my time, money, and creative energy.
If you do decide to use wood to build your house, you may want to go the wood and concrete route. Except for the posts, and ceiling structure, the whole bottom floor of our Chiquita Banana house is made of concrete.
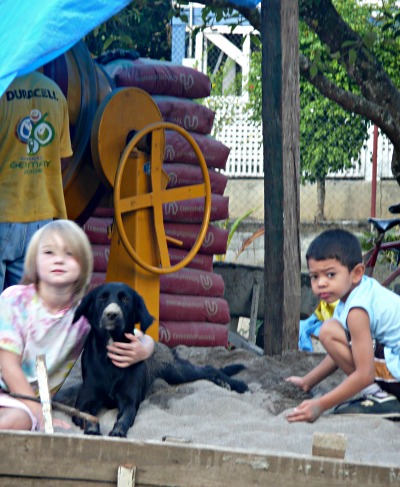
Which is why cement is the typical building material of all of Latin America.
It is also what we use as the primary construction material for our Living in Panama House.
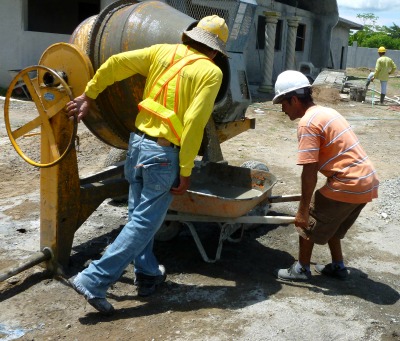
It is wise to keep your construction project within the comfort zone of the local workers. Builders in Panama are most comfortable working with concrete.
Think of Panama as a small town of 100 years ago, where folks are used to doing things the same way, generation after generation. Of course, they can learn new ways, but it won't be a fast, easy, or necessarily successful process.
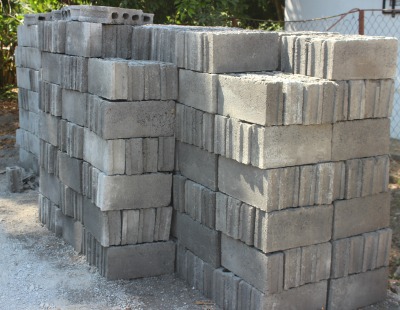
Concrete block is the most common method of construction. It is usually reinforced with steel rebar and the hollow cells in the blocks are filled with a concrete slurry.
Standard concrete blocks are 16” long and are available in 4” and 6” thicknesses.
Half blocks may be purchased to maintain the overlapping rhythm of the block structure. Block may easily be cut with a grinder, or scored and broken to size. (This is the most common method both in Panama and in North America).
As I mention in another article on hardware stores, the quality of block available in Puerto Armuelles varies greatly from supplier to supplier, and even between batches from the same supplier. You need to inspect each shipment, and even every block. Some blocks literally fall apart in your hands, while others are perfectly adequate, especially if you use plenty of steel reinforcement, and fill all cells with concrete.
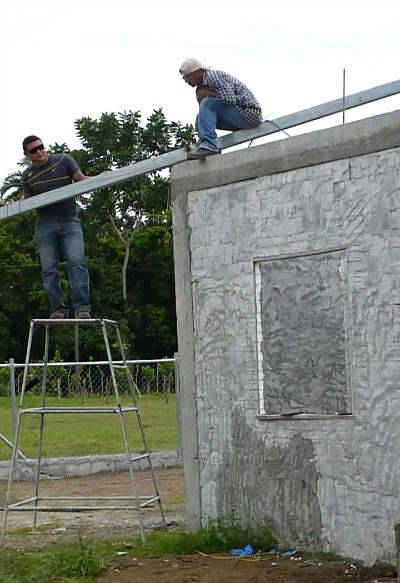
Please note: No block that I have encountered in Panama is of the high quality that one would encounter at a typical home center, or concrete supplier in the States or Canada.
However, I believe that in the very near future, as with everything else in Panama, the quality of local block will rise to the level of that in North America. The growth rate and improvements in quality in Panama are like nothing I have seen anywhere in my lifetime. The pace of growth and modernization in Panama is truly astounding.
Custom Blocks In Puerto
Our best block supplier has agreed to provide custom blocks using a higher ratio of cement to aggregates than his standard block. He will make it your specifications.
In other words, we can start getting that higher North American- quality block in Puerto Armuelles today.
M2 or Convintec is a insulated Styrofoam core panel covered with a galvanized steel mesh that is used
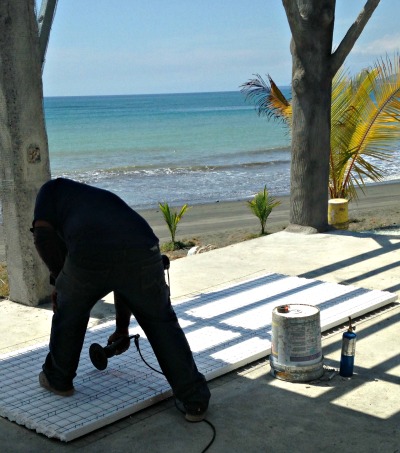
primarily for interior and exterior walls and sometimes for flooring or the roof.
M2 is used in place of concrete blocks, but must be “stucco coated” or "repello" with concrete.
M2 is increasingly popular and allows building to go up very quickly. Some people import higher quality M2 panels than are available in Panama. But most are successful using the locally available M2 panels.
M2 panels come in different thickness. Ideally, you should use panels at least 4 inches thick. Panels thinner than 4 inches have a tendency to buckle and are not load bearing.
Plycem is a fiber cement board widely used to replace wood siding, plywood, tile base in showers, and, at times, sheetrock. It can be cut, sanded, nailed, rough dressed, drilled and screwed with conventional woodworking tools.
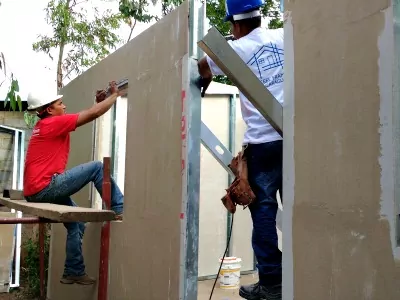
There is a similar product to Plycem available in the States. It is called Hardiboard.
Benefits of Plycem
Plycem is designed to be screwed into wood or steel studs and floor joists. 3/4 or 1" Plycem can even replace plywood floors, when placed on closely spaced floor framing using steel studs or wood.
In our own house, we have used Plycem as the base for a tiled kitchen floor as well as for the floor and walls of our bathrooms.
Thanks.
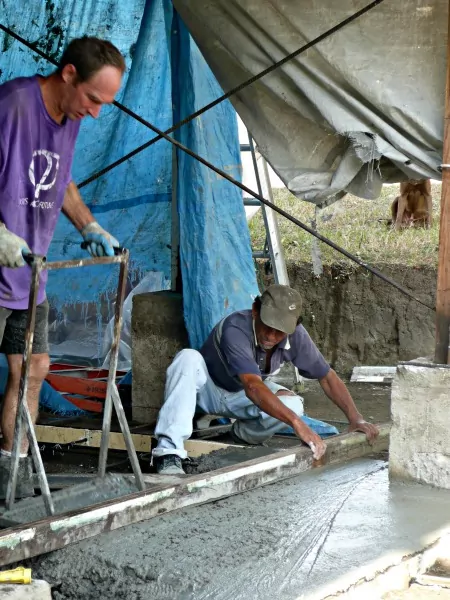
I wrote a post about each of these 4 building materials. The links to those posts are at the bottom of this page.
Whatever construction materials you use for your house, you need think about your choice carefully.
Hopefully, the answer is yes to all of the above questions. If not, make sure you are okay with the extra work and/or cost using your chosen material will entail.
One thing you should be careful about, is using building materials or construction techniques with which the local labor is unfamiliar.
If you get too innovative, you are likely to lose the locals along the way. Certainly, they will not be as interested in trying a new building experiment as you, the northern immigrant. You are in for a shock, if you came to Panama with ego-driven notions of how you would build, once you had moved to paradise, and with labor day rates that are less than half of what hourly rates are up north.
For some of us (I include myself here), this will require that we put our own ego in the “back seat." If you don't, you will face a lot of frustration, cost overruns, and disappointing results.
For me, after a long period of trying get the local builders to do things exactly, precisely my way, I have come to the conclusion that it is just not worth it. Believe me, I have tried it, many times (I am a slow learner). It just does not work. Or if it works, it is not a happy experience for anyone.
There are many wonderful things about the Panamanian people. When taken on their own merits, the people of Panama are kind, peaceful, genuinely warm neighbors, and happy to share their beautiful country with us. However, an intrinsic desire to learn something new, from foreigners no less, is not high on their priority list.
It is my opinion that we expats do best when we accept that fact. When we don’t try to impose our own perfectionism and rigid views upon the locals. Our own culture has certainly made plenty of mistakes, and continues to make mistakes and on a global scale.
Maybe we are being offered this opportunity to compromise a bit, to be less perfectionistic and judgmental . With this attitude well in mind, you can produce an interesting, good quality, project. A project that you can be proud of. And most importantly, you will build your house in a way that will not make enemies of your new Panamanian friends. Those relationships will be a joy for years to come.
A little history may help.
In the beginning, land in Panama did not belong to anyone. The indigenous people used it collaboratively.
Then the Spanish came.
They declared all land in Panama belonged to the Spanish Crown. However, the Crown only cared about the land from Colon to Panama City - for the same reason it is valuable now, as a port for global trade.
In the interior, the Crown continued the communal tradition of Panama's indigenous people by selling some land to villages to be owned collectively. Some large tracts of land were also granted to favored subjects. On the rest, the Crown recognized the right of small farmers to use, but not own, as much land as they needed.
At that point it was a bit like feudal England. The Crown was fine with you using its land as long as you played nice and obeyed the King or Queen. And even after its grants and sales, almost all of the land in Panama remained untitled and in the Crown's domain.
Then, 300 years later, Spain left. All of that land now belonged to the new government.
Not Much Titling Going On
The new Panama government asked its citizens to title any land they were using by showing proof of their land claim. But very few bothered to do that.
Getting title was an expensive and long process. Even many of the wealthy folks didn't do it. That's because once you title, you must start paying property and capital gains taxes.
Titling today is much cheaper and somewhat faster. However, most land in Panama continues to be ROP with the government holding the title. So in many ways it continues today the way it did when Panama was a colony of Spain.
Of course, as we all know, even in North America with its almost 100% titled property, government can step in. Have you heard of Eminent Domain? Trump and Cruz were arguing about it in a debate a few months ago. That is, if the state needs your property they can come in and take it, with a "fair market" compensation, of course. Trump and Cruz were arguing whether it was okay for the government to take land to build a parking lot.
It means you can use the property any way you want, just as if you held title to the land. It means you own the right to use the land, just as if you had the title.
Except, because you don’t own the title, you don’t have to pay taxes.
Required Research
Since ROP properties are not registered with the State, you need to make sure that the person selling you the property really owns it. See this post on how to buy ROP property safely for more on how to do that.
To avoid doing that work, you can buy ROP land from someone like us who has done all that work for you. We go through an extensive investigative process to ensure that there is a clear ownership trial and collaborative documentation for all our ROP properties.
Required Maintenance
In addition to research, you have to go out and physically claim your property in a noticeable way. Something that says there are new owners of this property. We always recommend that you immediately put up a fence. If a fence is already there, paint the fence. At a minimum, have someone go out on a somewhat regular basis and keep the grass cut. Just something so everyone knows that the property is owned and cared for by you. You don't have to be there yourself, the fact that you are hiring someone to cut the grass is enough. Or you could build a rancho or some sort of structure.
You are establishing that you are the new owner, the person that holds the right to use the property. If there is ever a legal challenge, the court will ask for your proofs of ownership. That is when you pull out your evidence of activity.
We have been establishing ownership of our ROP property for years. We put up fences on all our properties and maintain them. We also get to know our neighbors. That isn't necessary, but it is a good idea for many reasons. My husband especially loves to chat with all the neighbors. He even knows the names of all their dogs. Because of this there is no doubt in anyone's mind about who owns those properties - we do. And that certainty of ownership is entirely passed on to you, when you buy our property.
Maintenance & Titled Property Keep in mind, you need to keep your eye on titled property too. If someone is using your land for 10 years in good faith (that is, they didn't know you owned it), they can get title. Or in 15 to 20 years if they are using it in bad faith (that is they know you own it, but decide to ignore that fact.)
Of course, that can happen in the States too.
My sister-in-law lost part of her land because for years she allowed a neighbor to garden a section of it. When she went to sell it, she faced a legal battle to keep that "garden" as part of her land. She lost. Her neighbor is still gardening that strip. My sister-in-law sold her property minus that section. She never got reimbursed for the loss.
You can avoid my sister-in-law's loss in both Panama and the US by simply having the people using your land sign a document. A document that states they are using the land on a temporary basis, or even better yet make it a rental agreement, even if only for a nominal fee. That precaution works for both ROP and titled land.
Pay No Taxes
ROP property is excluded from property taxes and all land transaction taxes (i.e., capital gains, transfer fee).
Learn more about Panama property taxes & exemptions here.
There is a big market for ROP property. It is routinely bought, sold, and traded - just like titled property.
You can just as easily earn a profit reselling ROP land as titled land.
In fact, some people prefer ROP to titled property. This is because, as I've mentioned, you don't have to pay property or capital gains tax with ROP property. In addition, ROP land tends to be cheaper than titled land.
As I alluded to in this post, some of the same kind of land issues with ROP (and titled) property in Panama occur in North America as well (think of my sister-in-law's property loss and eminent domain).
Now that you have a clearer understanding of what ROP means, you can decide if the benefits of ROP land outweighs the costs.
Which type of property are you looking to buy? Please share in comments below.
Check out these links to get our guide to titling Panama property . You can also read about 3 things you must do when you buy ROP property.
If you have questions, please feel free to call us or leave a comment below.